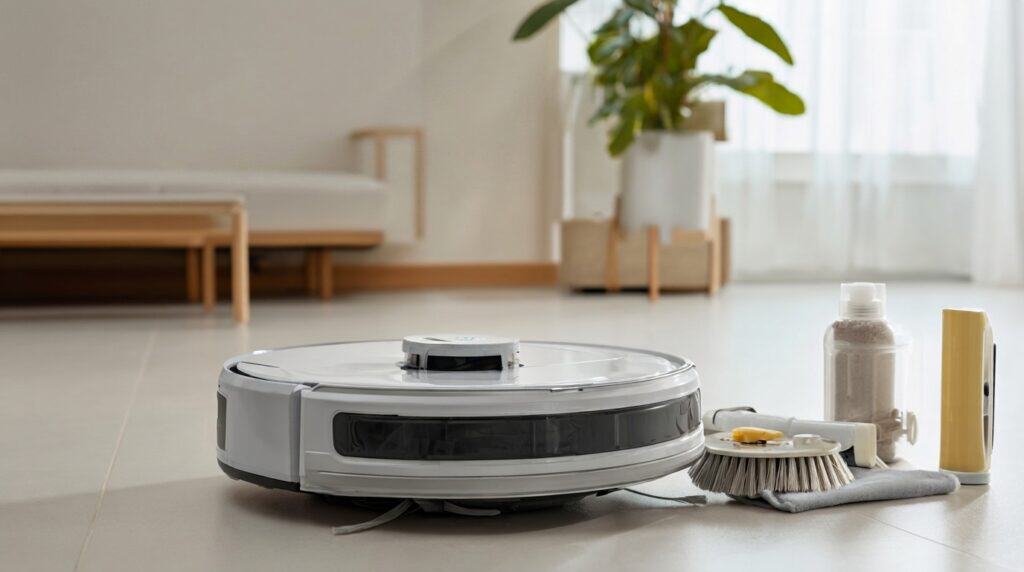
Robot vacuums are designed to run on their own, but they do need regular care to keep working well. A robot vacuum maintenance schedule helps you know what to clean and check — and roughly how often — so small issues don’t build into larger problems over time.
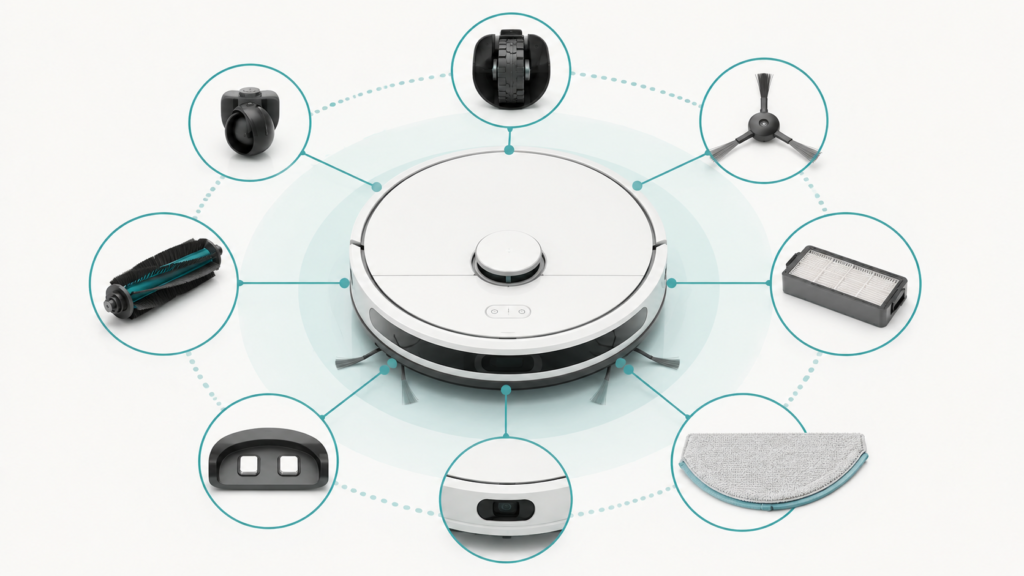
This guide covers the main components that benefit from regular attention: the dustbin, filters, main brush, side brushes, sensors, wheels, charging contacts, and the dock. Tasks are grouped by approximate frequency, from quick checks after cleaning runs to less frequent monthly routines. Keep in mind that the right schedule depends on your model and home. Your manufacturer’s manual is the authoritative reference for the specific intervals and methods that apply to your robot vacuum.
Quick Answer
Here is a simplified overview of a practical robot vacuum maintenance routine:
- After most cleaning runs: Check whether the dustbin needs emptying, especially in pet or high-debris homes.
- Weekly or more often in heavy-use homes: Clean the main brush and side brushes, and empty the dustbin.
- Monthly or occasionally: Wipe sensors with a dry cloth, check wheels for hair buildup, and clean charging contacts.
- As needed — check your manual first: Clean the filter using the correct method for your model. Some filters are washable; others should not be cleaned with water.
- Eventually: Replace worn parts such as brushes and filters as recommended by your manual.
Exact timing varies by model, floor type, pets, and usage. Always check your manual for your model’s specific recommendations.
Table of Contents
- Why Maintenance Schedules Vary by Model and Home
- After Each Run: Quick Checks to Build Into Your Routine
- Weekly Checks: Brushes, Dustbin, and Visible Debris
- Filter Care: How You Clean It Depends on Your Model
- Monthly Checks: Sensors, Wheels, and Charging Contacts
- Dock and Base Station: What Still Needs Attention
- Mop-Equipped Models: Additional Maintenance to Plan For
- When Cleaning Is Not Enough: Thinking About Replacement
- A Simple Maintenance Framework You Can Adapt
- Common Maintenance Mistakes to Avoid
- Frequently Asked Questions
- Final Takeaway
Why Maintenance Schedules Vary by Model and Home
One of the most common questions robot vacuum owners have is: “How often should I actually be cleaning this?” The honest answer is that it depends on your model and your home.
Different robot vacuums have different filter designs, brush types, dustbin sizes, and dock configurations — and manufacturers often recommend different maintenance intervals for each. Some manuals suggest cleaning the main brush and filter every two weeks. Others recommend weekly care for the same tasks. Even within a single brand, intervals can differ from one model tier to the next.
Home conditions add another layer of variation. A home with pets and thick carpets generates more hair and debris, which means brushes and filters fill up faster. A smaller home with smooth floors and light daily use may stay cleaner longer between maintenance sessions.
The framework in this guide is a practical starting point, not a fixed universal schedule. Think of the timing buckets — after-run checks, weekly, monthly — as approximate categories rather than strict rules. Adjust them based on what your manual recommends and what you notice when you open the robot for a regular check.
After Each Run: Quick Checks to Build Into Your Routine
Not every maintenance task needs to be scheduled. Some of the most useful checks take only a few seconds and can become a natural part of your post-cleaning routine.
After a cleaning run, it is worth occasionally checking:
- Whether the dustbin is full or nearly full. This matters most in pet homes or after a longer run in a dusty space. A consistently overfull dustbin can reduce suction on the next cleaning cycle.
- Whether the robot returned to its dock. Checking occasionally that the robot is actually charging — rather than sitting idle somewhere mid-floor — helps catch navigation or docking issues early.
- Whether there is anything visibly caught in the main brush. A quick glance can spot a significant hair tangle or piece of debris before it becomes harder to remove.
These checks aren’t necessary after every single run in every household. In lighter-use homes with smooth floors, many owners find a weekly review covers all three. In higher-debris homes, a brief post-run glance becomes a genuinely useful habit.
If you have a model with an auto-empty dock, the dock handles dustbin emptying automatically. It is still worth confirming occasionally that the dock’s indicator is not signaling a full bag or container.
Quick post-run check
After a normal cleaning run, a few quick checks can help you spot visible debris before it builds up. Exact steps can vary by model, so check your manual if a part does not remove easily.
- Check the dustbin if it looks full.
- Look for hair or debris around the brush area.
- Check the wheels for trapped lint or small debris.
- Gently wipe visible sensor areas if they look dusty.
- Confirm the robot can return to the dock normally.
Weekly Checks: Brushes, Dustbin, and Visible Debris
For most robot vacuum owners, a weekly maintenance check covers the tasks that accumulate most quickly and have the biggest effect on cleaning performance.
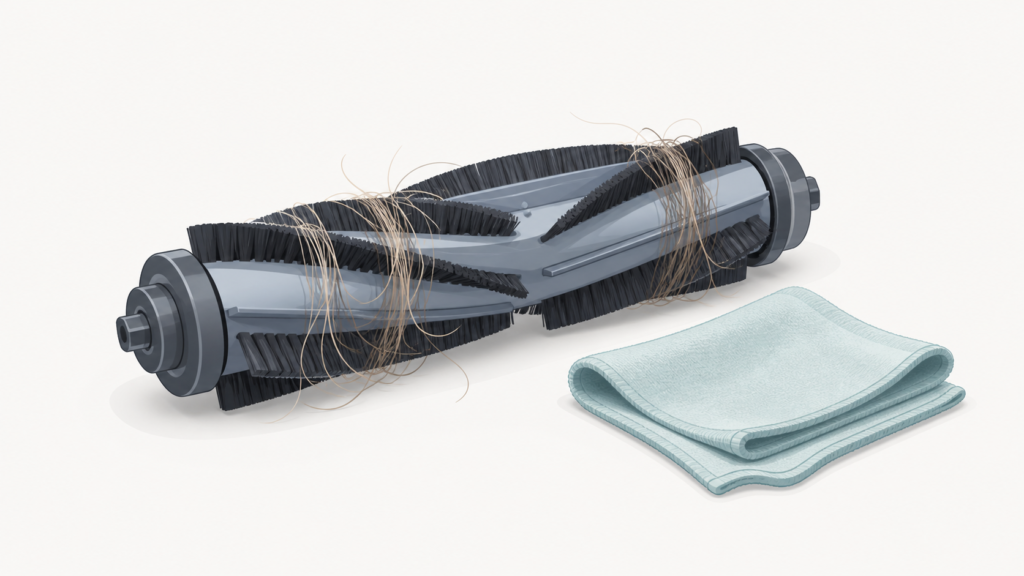
Main brush or brushroll. Hair, string, and fine debris wrap around the main brush over time. In pet homes, this buildup can be surprisingly fast. Checking the brush weekly and cleaning it when you see significant tangling keeps it working as designed. For a step-by-step walkthrough of how to remove and clean the brush, see How to Clean Robot Vacuum Brushes.
Side brushes. Side brushes sweep debris toward the suction path. They accumulate hair around the base and, with regular use, can bend gradually out of their original shape. A weekly check for tangles or visible deformation takes just a moment.
Dustbin. Even in homes without pets, the dustbin fills over the course of a week. Emptying it at least once a week — or more often in heavier-use homes — keeps the suction path clear for the next run.
Your manual may recommend checking these components more or less often than weekly. Some manuals set a shorter interval for main brush cleaning in certain home conditions. Use your manual’s guidance as the baseline for your model.
Filter Care: How You Clean It Depends on Your Model
Filters trap fine dust and particles before air passes back through the robot and into the room. When a filter becomes clogged, suction drops — and the robot may continue running without cleaning as effectively as it should.
Checking and cleaning the filter periodically is one of the most important parts of a regular maintenance routine. How you clean it, though, depends on your specific model.
Some filters are washable. These can be removed, rinsed with cool water, and set aside to dry completely before reinstallation. A washable filter that is reinstalled while still damp can introduce moisture into the motor, which may cause damage. Many manufacturers recommend waiting at least 24 hours before putting a washed filter back in.
Other filters should not be cleaned with water. For non-washable filters, the recommended approach is to gently tap the filter over a bin to release loose dust, or to use a soft brush to clear the surface. Using water on a filter that is not designed for it can damage the filter material and reduce its effectiveness.
Before cleaning your filter for the first time, check your manufacturer’s manual to confirm which type your model uses. The two approaches are not interchangeable — what is safe for one filter type can damage another. For a complete guide to dustbin and filter care, see How to Clean a Robot Vacuum Dustbin and Filter: A Beginner’s Guide.
Even washable filters eventually need replacing. Cleaning extends their useful life, but all filters have a limited lifespan. Your manual or the manufacturer’s guidance will tell you when it is time to replace rather than continue cleaning.
Monthly Checks: Sensors, Wheels, and Charging Contacts
Some maintenance tasks don’t need to happen every week, but they can have a noticeable impact on reliability when they’re overlooked over time. Monthly — or occasionally — is a reasonable cadence for the following.
Sensors. Robot vacuums rely on cliff sensors, wall sensors, and other sensor types to navigate reliably. These sensors can accumulate dust over time, which may affect how accurately the robot detects edges and obstacles. Wiping the sensor surfaces gently with a soft, dry cloth is the standard approach. This is not a guaranteed fix for all navigation problems, but it is a reasonable first step when the robot starts behaving differently than usual.
Wheels and casters. The main drive wheels and the front caster wheel can collect hair and debris, particularly hair that wraps around the axle. If the robot begins veering to one side or moving less smoothly than before, checking the wheels for buildup is worth doing. Removing visible debris from around the wheels is usually straightforward — check your manual if your model’s caster requires a specific removal method.
Charging contacts. Dust or small particles on the metal charging contacts — on both the robot and the dock — can interfere with reliable charging. Wiping them with a soft, dry cloth monthly is a simple and low-effort preventative step. Avoid wet cloths or chemical cleaners on the contacts unless your manual specifically allows it.
Dock and Base Station: What Still Needs Attention
The dock is easy to overlook during routine maintenance, but it benefits from occasional care as well.
Basic charging docks mainly need the contact surfaces kept clean and the area around the dock kept clear of dust and debris. For guidance on placement and keeping the dock environment set up for reliable returns, see Where to Place a Robot Vacuum Charging Dock: Beginner Setup Guide.
Auto-empty docks require more attention. An auto-empty dock transfers debris from the robot’s onboard dustbin automatically, which reduces how often you need to empty the bin by hand. However, the dock itself has its own maintenance requirements:
- The dust bag or collection container inside the dock needs to be emptied or replaced when full.
- Some docks include a dock-side filter that needs periodic cleaning.
- Dock contact surfaces still need occasional wiping, just as with a basic dock.
An auto-empty dock reduces your hands-on bin work — it does not eliminate dock maintenance. The specific tasks and intervals vary by dock model. Check your dock’s manual for the complete list.
Water-handling or mop-washing docks add further steps: managing clean and dirty water tanks, maintaining cleaning trays, and following any dock-specific maintenance sequences. These are model-specific — always consult the dock’s documentation for the right approach.
Mop-Equipped Models: Additional Maintenance to Plan For
If your robot vacuum includes a mopping function, you will have a few maintenance tasks in addition to the standard checklist.
Mop pads. Whether pads need washing after every use, every few uses, or periodic replacement depends on the pad type and model. Some pads are designed to be machine-washed; others are disposable. Models with self-washing dock stations handle pad rinsing automatically, but may still require occasional manual cleaning or pad replacement over time.
Water tanks. Most mop-capable models have an onboard water tank that needs to be filled before mopping runs. Many manufacturers also recommend emptying and drying the tank after use to prevent mineral buildup or mold. The exact guidance varies by model.
Cleaning solutions. Not all mopping robot models support the use of cleaning solutions in the water tank. Using an unsupported solution can damage internal water system components. Check your manual before adding anything other than plain water.
Mop-related maintenance varies significantly by model. If your robot includes a dock with an integrated water system, that dock will have its own additional steps — consult the dock’s documentation.
When Cleaning Is Not Enough: Thinking About Replacement
Regular maintenance extends the life of consumable parts, but it does not prevent them from wearing out. At some point, cleaning is no longer enough and a part needs to be replaced.
Common parts that eventually reach the end of their useful life include the main brush or brushroll, side brushes, filters, mop pads, and dust bags in auto-empty dock models. Signs that a part may need replacing rather than additional cleaning include visible bristle bending or breakage, persistent odor from the filter even after proper cleaning, or suction that does not return to normal after filter maintenance.
Replacement timing varies by part type and by model. For a more detailed look at replacement schedules and what to watch for, see How Often Should You Replace Robot Vacuum Parts?
A Simple Maintenance Framework You Can Adapt
The table below summarizes the maintenance tasks covered in this guide, grouped by approximate frequency. This is not a universal manufacturer schedule — it is a flexible starting point. Adjust the timing based on your model’s manual, your home conditions, pet situation, and how often the robot runs.
Important: This framework is not a universal manufacturer schedule. Use it as a starting point and adjust it based on your model, manual, floor conditions, pets, and cleaning frequency.
| Maintenance Bucket | What to Check or Clean | Why It Matters | Important Caution |
|---|---|---|---|
| After most runs (as needed) | Dustbin level; main brush for visible tangling; dock return confirmed | Prevents overfull bin from reducing suction; catches docking or brush issues early | Frequency depends on debris load and household; less critical in lighter-use homes |
| Weekly or more often in pet / high-debris homes | Main brush; side brushes; dustbin | Brush tangles reduce cleaning performance; full dustbin reduces suction | Your manual may recommend a shorter interval for your model |
| Monthly or occasional | Cliff sensors and wall sensors (wipe with dry cloth); drive wheels and front caster (check for debris); charging contacts on robot and dock (wipe with dry cloth) | Sensor dust can affect navigation reliability; wheel buildup can cause uneven movement; dusty contacts can interfere with charging | Removal method for wheels and casters varies by model — check your manual |
| As needed — check your manual first | Filter — clean using the correct method for your model type | Clogged filters reduce suction and air quality | Some filters are washable; others should not be cleaned with water. Check your manual before cleaning. |
| When performance changes or dock prompt appears | Auto-empty dock: dust bag or collection container; dock-side filter if present; dock trays and surfaces | Dock buildup reduces auto-empty function; ignoring dock maintenance leads to compounding issues | Dock maintenance tasks and intervals vary by model and dock design |
| Eventually — as parts wear out | Main brush; side brushes; filters; mop pads; dust bags | Parts wear out even with good maintenance; cleaning extends life but cannot prevent eventual replacement | Check your manual or manufacturer guidance for replacement timing |
Common Maintenance Mistakes to Avoid
Even owners who maintain their robot vacuums regularly can run into a few common patterns that reduce the effectiveness of their care routine.
Washing a filter that should not be washed. This is one of the most consequential errors in robot vacuum maintenance. Some filters are designed to be rinsed with water and fully dried before reinstallation. Others explicitly should not be cleaned with water — the filter material is not suited for it, and using water can damage it permanently. Always check your manual before cleaning a filter for the first time. If the manual says to avoid water, take that instruction literally.
Reinstalling a washed filter before it is fully dry. Even if your filter is washable, putting it back while it is still damp can introduce moisture into the motor. Many manufacturers recommend waiting at least 24 hours before reinstallation. Rushing this step is not worth the risk.
Assuming auto-empty means no maintenance. An auto-empty dock transfers dust from the robot’s bin automatically, but the dock itself still has components that need attention: the collection bag or container, the dock-side filter (if present), and the charging contact surfaces. Skipping dock maintenance because “it empties itself” can lead to dock performance issues over time.
Skipping maintenance because the robot still seems to work. Performance degradation from a clogged filter or a heavily tangled brush often builds gradually. A robot vacuum can continue running even when its cleaning effectiveness has dropped significantly. Periodic checks catch these issues before they become harder to notice or correct.
Using a schedule intended for a different model. Maintenance intervals and cleaning methods are model-specific. An interval that works for one robot vacuum may not be appropriate for yours. Your manual is the correct reference for your model.
If you notice persistent issues despite regular maintenance — consistent navigation problems, unexpected stopping, or error indicators — that may signal something beyond routine wear. Why a Robot Vacuum Stops Working: Common Beginner Troubleshooting Checks covers the most common causes that go beyond standard maintenance.
Frequently Asked Questions
How often should I clean my robot vacuum?
There is no single answer that applies to every model and home. A practical starting point is to check the dustbin and brushes at least weekly, handle sensors and contacts occasionally — monthly is a common reference point — and follow your manual’s recommended intervals for your specific model. Homes with pets or heavy daily use will generally need more frequent checks across most components.
Should I empty the dustbin after every run?
Not necessarily — it depends on the household. In homes with pets or a lot of foot traffic, checking after each run is a reasonable habit. In lighter-use homes, once a week is often enough. If your robot has an auto-empty dock, the dock handles emptying automatically, but the dock’s own collection bag or container still needs to be managed when full.
Can I wash my robot vacuum filter?
It depends on your model. Some robot vacuums use washable filters that can be rinsed with water and allowed to dry completely before reinstallation. Others use filters that should not be cleaned with water at all — for those, gently tapping or brushing off loose dust is the correct approach. Check your manufacturer’s manual before cleaning your filter for the first time to confirm which method applies.
How often should I clean the main brush?
This varies by model and usage. Weekly inspection is a common starting point, with cleaning done whenever you notice significant hair or debris accumulation. In pet homes, you may find it needs cleaning more than once a week. Your manual provides the model-specific recommendation.
Do self-empty docks still need maintenance?
Yes. Auto-empty docks handle the dustbin transfer automatically, but they do not eliminate dock maintenance. The dock’s collection bag or container needs to be replaced or emptied when full. Some docks also have dock-side filters and cleaning trays that require periodic care. Check your dock’s manual for the complete list of required tasks.
How often should I clean robot vacuum sensors?
A monthly wipe with a soft, dry cloth is a reasonable starting point for most models. Sensor surfaces can accumulate dust over time, and cleaning them periodically can help maintain navigation reliability. Keep in mind that sensor cleaning is one possible step when the robot starts behaving differently — it does not resolve all navigation issues. Your manual may identify which sensors to clean and the recommended method for your model.
Should pet owners clean a robot vacuum more often?
Generally, yes. Pet hair fills the dustbin faster, wraps around brushes more quickly, and can clog filters more rapidly than typical household dust. In pet homes, checking brushes more than once a week and inspecting the filter more frequently than the minimum recommended interval is a practical adjustment. Exactly how much more often depends on the number of pets, their coat type, and your floor surfaces — there is no single fixed pet-household schedule.
Final Takeaway
A robot vacuum maintenance schedule does not need to be complicated. The most practical approach is to think in terms of frequency: brief checks after runs when needed, weekly attention to brushes and the dustbin, monthly care for sensors and contacts, and filter maintenance using the correct method for your model — which may or may not involve water.
The most important variable in any maintenance routine is your specific model and home. Your manufacturer’s manual gives the correct intervals and methods for your robot vacuum. When this guide and your manual give different guidance, follow your manual.
Regular maintenance keeps a robot vacuum running reliably and helps you catch small issues — a tangled brush, a full filter, a dusty sensor — before they affect performance. It also helps you recognize when cleaning is no longer enough and a part may need to be replaced.