If you are trying to understand why a robot vacuum stops working, the cause is not always a broken part. In many cases, a stopped robot vacuum may be related to charging, an obstruction, a full dustbin, a clogged filter, dirty sensors, or a message that needs to be checked in the manual. This guide walks through the most common, beginner-safe checks to try before assuming the robot needs repair or replacement.
This is not a repair manual, a brand-specific support guide, or a list of guaranteed fixes. It is a calm overview of the cause categories that show up again and again across different robot vacuum brands, along with simple, external checks a beginner can safely try first.
Table of Contents
- Quick Answer
- Why a Robot Vacuum Stops Working
- Start With the Safest Basic Checks
- Check the Charging Dock and Power Connection
- Look for Brush, Wheel, or Body Obstructions
- Check the Dustbin and Filter
- Wipe Accessible Sensors Gently
- Check for Error Messages or App Prompts
- When to Stop Troubleshooting and Contact Support
- Common Mistakes to Avoid
- Beginner Checklist Before You Contact Support
- FAQ
- Final Takeaway
Quick Answer
A robot vacuum can stop working for several different reasons, and there is rarely just one cause. Common categories include a charging or dock connection issue, something physically blocking the brushes, wheels, or body, a full dustbin or clogged filter, dirty sensors, or an error message that needs to be checked in the manual. In many cases, a few simple external checks — without opening or repairing the unit — can help narrow down what is going on. If those checks do not help, contacting the manufacturer’s official support is the safest next step.
Why a Robot Vacuum Stops Working
There is no single explanation for why a robot vacuum stops mid-clean or refuses to start. Different brands report the same handful of cause categories, and a beginner-safe overview can help you check the most likely ones without guessing.
A Power or Charging Issue
A robot vacuum that is not charged, or is not seated correctly on its dock, may not start or may stop early. This can include dust on the charging contacts, a dock that is not receiving power, or, on some older devices, a battery that no longer holds a full charge. Charging is one of the most frequently reported cause categories across different manufacturers, which is why it is usually one of the first things worth checking.
A Blockage Around Brushes or Wheels
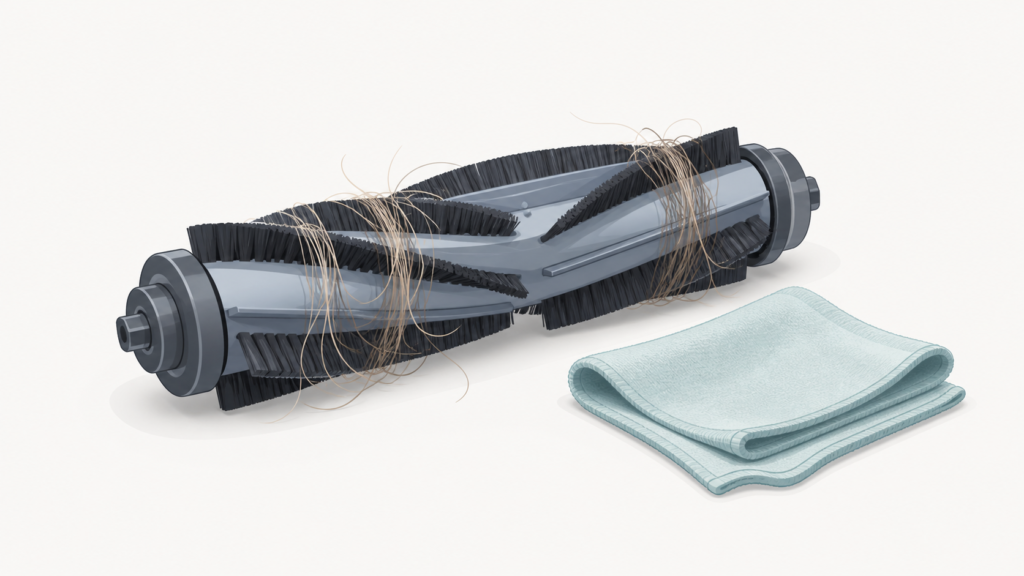
Hair, fibers, or debris wrapped around the main brush, a side brush, or a wheel can interrupt movement or cleaning. This is a mechanical, visible obstruction rather than an internal fault, and it is one of the more common reasons a robot vacuum slows down, struggles to turn, or stops mid-run.
A Full Dustbin or Clogged Filter
A full dustbin or a dirty filter can restrict airflow, and on some models this can interrupt cleaning or trigger a maintenance prompt. This is a normal part of regular upkeep rather than a sign of a defect.
Dirty or Blocked Sensors
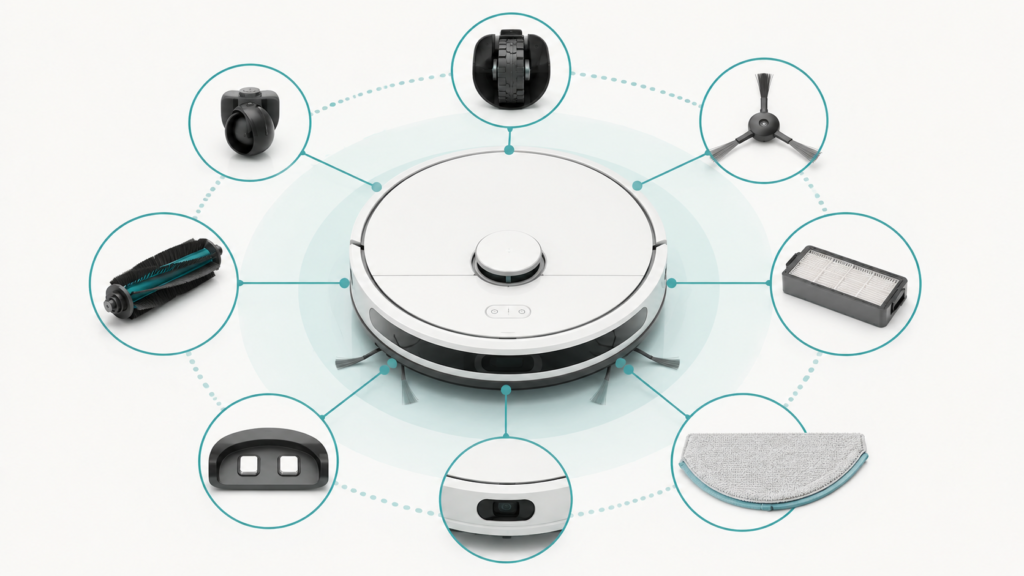
Sensors help a robot vacuum understand its surroundings, including detecting drops like stairs. Dirty or blocked sensors can sometimes make the robot behave cautiously, stop unexpectedly, or in some cases refuse to start.
The Robot Is Physically Stuck
A robot vacuum can become wedged under low furniture, caught on a cord, or tangled in a rug edge or tassel. This is an environmental obstacle rather than an internal problem, and it can pause or stop a cleaning run on its own.
The table below summarizes these categories alongside a safe first check for each.
| Common Symptom | What It May Suggest | Safe Beginner Check |
|---|---|---|
| Won’t start at all | A charging or power issue | Confirm the robot is seated on the dock and the dock has power |
| Starts, then stops mid-clean | An obstruction, full bin, or sensor issue | Check brushes, wheels, dustbin, and visible sensors |
| Spins in place or seems stuck | A wheel or body obstruction, or a physical obstacle | Check for tangled hair, debris, or being wedged against furniture or a cord |
| Stops near the dock but won’t dock | A charging contact or dock placement issue | Gently check the contacts and confirm the dock’s location and clearance |
| Shows a light, sound, or app message | An error indicator specific to that model | Check the meaning in your model’s manual or app, rather than guessing |
Start With the Safest Basic Checks
The checks in this guide are external and non-invasive. None of them require opening the robot, removing internal covers beyond the dustbin and filter compartments described in your own manual, or attempting any repair. If a check below does not resolve the issue, that is a normal outcome — it simply means the cause may be something better handled by the manufacturer’s own support resources.
Check the Charging Dock and Power Connection
Start by confirming the robot is seated correctly on the dock and that the dock itself is plugged into a working outlet. Dust or debris on the charging contacts, on either the robot or the dock, can sometimes prevent a reliable connection — gently wiping them with a dry cloth is a common first check. If your robot vacuum often struggles to dock or charge, the way the dock itself is placed can also play a role; see our guide on charging dock placement for more on this.
Look for Brush, Wheel, or Body Obstructions
Turn the robot over carefully, or check the underside as your manual describes, and look for hair, fibers, or debris wrapped around the main brush, a side brush, or a wheel. Removing visible buildup is a safe, external check. For the full cleaning process, see our guide on cleaning robot vacuum brushes.
Check the Dustbin and Filter
A full dustbin or a dirty filter can reduce airflow on some models, which may affect cleaning or trigger a maintenance prompt. Emptying the bin and checking the filter is a simple, regular check rather than a repair step. Our guide on dustbin and filter cleaning covers the cleaning process in detail.
Wipe Accessible Sensors Gently
Many robot vacuums have sensors on the underside or around the bumper that are accessible for a gentle wipe with a soft, dry cloth. Dust or smudges on these sensors can sometimes affect how the robot detects its surroundings. Sensors are also part of how a robot vacuum understands its space more broadly — see how robot vacuum sensors work for more detail on what they do.
Check for Error Messages or App Prompts
If your robot vacuum has a light, sound, or app notification, check what it means in your specific model’s manual or app rather than assuming it matches another brand’s meaning. The same light color or beep pattern can mean different things across different manufacturers, so this is one area where general guidance is less useful than your own model’s documentation.
When to Stop Troubleshooting and Contact Support
If you have checked charging, obstructions, the dustbin and filter, and accessible sensors, and the robot still does not work as expected, it is a reasonable point to stop self-troubleshooting. Contacting the manufacturer’s official support is the appropriate next step, rather than attempting to open the unit or perform a repair yourself. Having your model number and a brief description of what you have already tried ready can help that conversation move faster.
Common Mistakes to Avoid
- Assuming the robot is broken immediately, before trying any of the simple checks above
- Trying a reset or restart sequence found online before checking your own model’s manual, since the exact method varies by brand
- Checking only the dustbin while skipping brushes, wheels, and sensors, even though several causes are usually worth ruling out
- Forcing a stuck wheel or brush instead of gently clearing visible debris
- Continuing to repeat the same checks for an extended period instead of contacting manufacturer support once basic checks are exhausted
Beginner Checklist Before You Contact Support
- Confirm the robot is seated correctly on a powered dock
- Gently wipe the charging contacts on the robot and dock
- Check for hair or debris around the brushes and wheels
- Empty the dustbin and check the filter
- Gently wipe any accessible sensors with a soft, dry cloth
- Look for anything physically blocking or trapping the robot
- Check any light, sound, or app message against your model’s manual
- Note your model number and what you have already tried
FAQ
Why did my robot vacuum suddenly stop working?
There is rarely a single reason. A sudden stop can be related to charging, an obstruction around the brushes or wheels, a full dustbin, dirty sensors, or the robot becoming physically stuck. The checks in this guide cover the most common categories.
Why does my robot vacuum start and then stop?
This pattern can suggest the robot is running into one of the same general causes mid-clean rather than failing to start at all — for example, an obstruction, a sensor issue, or the dustbin filling up partway through a run. The same basic checks apply.
Can a full dustbin make a robot vacuum stop?
On some models, yes. A full dustbin or a clogged filter can reduce airflow, and some robots are designed to pause or prompt a maintenance reminder when this happens.
Can dirty sensors cause a robot vacuum to stop?
Dirty or blocked sensors can sometimes make a robot vacuum behave cautiously or stop, since sensors are also involved in safety functions like detecting drops. Gently wiping accessible sensors is a safe first check.
Should I reset my robot vacuum?
Many manufacturers suggest a basic restart as an early troubleshooting step, but the exact method varies by brand and model. Check your own model’s manual or app rather than following a generic online instruction.
When should I contact manufacturer support?
If you have tried the basic external checks in this guide — charging, obstructions, dustbin and filter, and accessible sensors — and the issue continues, that is a reasonable point to contact the manufacturer’s official support rather than continuing to troubleshoot on your own.
Does a robot vacuum stopping mean the battery is bad?
Not necessarily. Battery age can be one possible factor on some older devices, but it is only one of several possible causes, and it is not something a beginner should try to diagnose or replace without manufacturer guidance.
Can a charging dock problem make the robot stop working?
Yes, this is one of the more commonly reported causes. Issues can include the robot not seating correctly on the dock, dirty charging contacts, or the dock not receiving power. Where and how the dock itself is placed can also matter.
Final Takeaway
A robot vacuum that stops working usually has one of a handful of common, checkable causes — charging, an obstruction, a full dustbin or filter, dirty sensors, or the robot becoming physically stuck. Working through these simple, external checks in order is a safe way to understand what might be happening before assuming the worst. If the issue continues after these checks, reaching out to the manufacturer’s official support is the next reasonable step, rather than attempting a repair on your own.